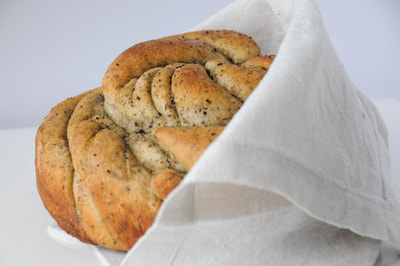
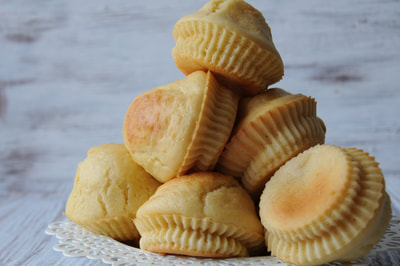
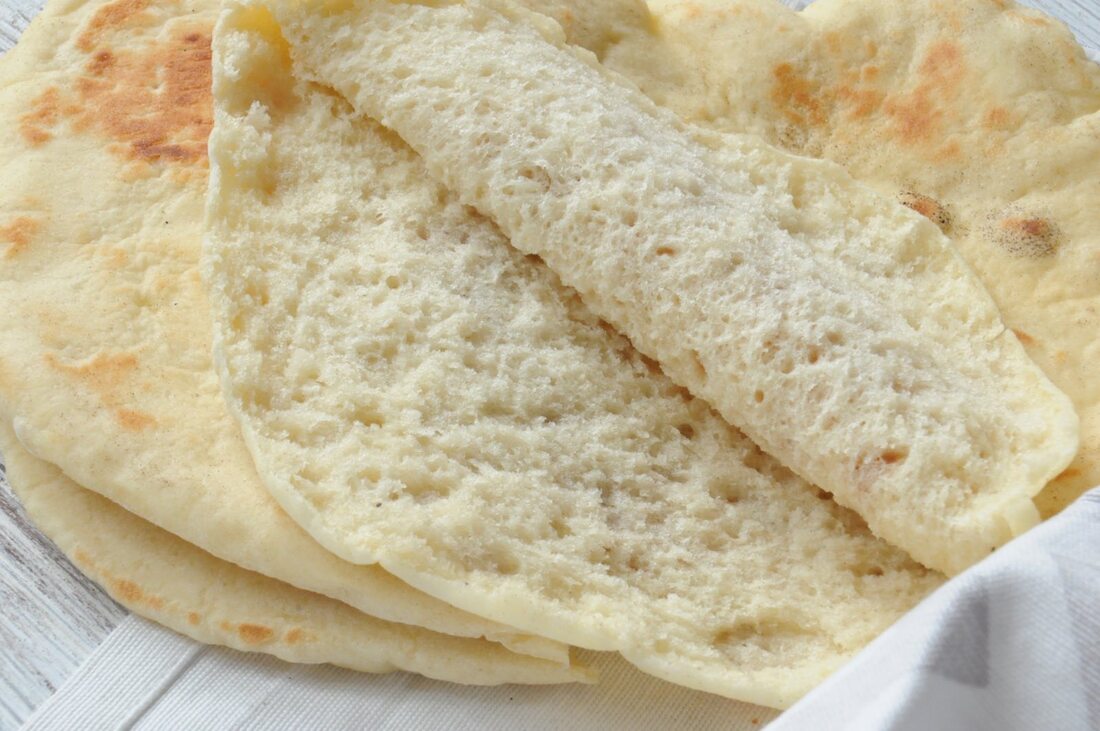
 Very tasty and soft! They require proper technique to be baked! The process may be complicated for you the first time around, but don't give up. They are worth every second! Ingredients for 7-8 pieces: 500 grams of flour (sifted) 2 bags of 7 grams of dried yeast ½ glasses of lukewarm water 1 Tablespoon of sugar 2 Teaspoons salt 170 grams of water 180 grams of liquid yogurt A spoonful of oil Butter Procedure: Pour the yeast into a glass, pour over half a cup of lukewarm water and add a tablespoon of sugar. Do not mix, just set aside for 5 minutes for the yeast to activate. Sugar helps with that. Sift the flour, remove 4 tablespoons of that flour into a separate bowl. Add salt to a larger portion of flour and mix. Pour in the water with the yeast, 170 grams of lukewarm water and yogurt and start stirring. Start from the middle, first gently making circular motions, then more energetically until you have a fine, smooth dough. Then gradually, one by one tablespoon, add the flour you have set aside. Only add the next spoon when you have nicely incorporated the previous one. Use your fingers more, trying to be as gentle with the dough as possible. You should eventually get a semi-solid ball. A little softer than dough for a pie. Put one tablespoon of oil on the palm of your hand, grab the dough and form a round shape (ball) with your hands. Leave it inside a bowl covered with cotton cloth for an hour. After that, transfer the dough to a floured surface and gently, using your fingers, not applying too much pressure, shape the dough into a roller. Cut it into 7 - 8 equal pieces. Shape these pieces into balls, gently pulling the ends inwards and using palms of your hand to form the edges. Cover the formed dough balls with a cotton cloth and allow the dough to rest for 10 minutes. After that, using a rolling pin, flatten the dough balls as much as its possible without applying extra effort and pressure. Do this with each dough ball, then cover again with a cotton cloth for 2 minutes. The dough will then be ready for further stretching. Use the rolling pin to flatten/stretch slight more, to the size of your non-stick pan, then cover again for 2 minutes until the pan is well heated. Do not use oil. The bread is baked on a hot, dry pan. After 30 seconds, flip over to the other side. When you have baked for another 30 seconds, flip it back (return) to the initial side. In a few seconds they will start to puff up. Allow them to inflate all the way, then roll over to the other side once more. When removed from the pan, coat with butter. P.S. After the first one, the pan will probably be too hot. Be careful not to burn them. Reduce heat as needed. 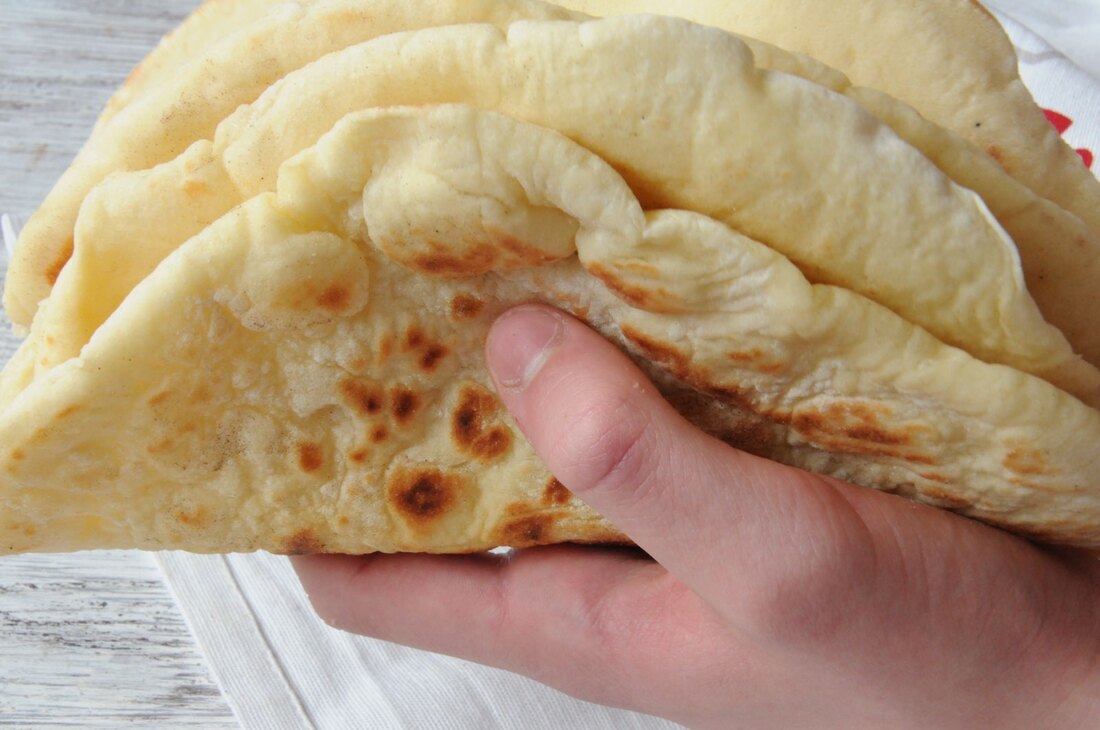 PogačicePreukusne i premekane. Zahtijevaju tehniku. Mozda će vam proces biti kompliciran prvog puta, ali ne odustajte. Vrijede svake izdvojene sekunde. Sastojci za 7-8 pogačica: 500 grama brašna (prosijano) 2 kesice po 7 gr suhe germe ½ čaše mlake vode 1 kašika šećera 2 kašičice soli 170 grama vode 180 grama tečnog jogurta Kašika ulja Puter Postupak: Saspite germu u čašu, prelijte s pola šolje mlake vode i dodajte kašiku šećera. Nemojte miješati, samo ostavite sa strane cc 5 minuta da se kvasac aktivira. Šećer mu u tome pomaže. Prosijte brašno, odvadite 4 kašike od tog brašna u posebnu zdjelicu. U veću količinu brasna stavite so pa izmiješajte. Ulijte vodu s kvascem, 170 grama mlake vode i jogurt pa počnite miješati. Krenite od sredine, najprije lagano praveći kružne pokrete, zatim energičnije sve dok ne dobijete fino, glatko tijesto. Potom postepeno, kašiku po kašiku dodajite ono brašno koje ste ostavili sa strane. Narednu kašiku dodajte tek kada ste lijepo inkoroporirali prethodno. Ne nakuhavajte tijesto, više koristite prste nastojeći prema tijestu biti što nježniji. Na kraju biste trebali dobiti polu – čvrstu loptu. Malo mekšu nego tijesto za pitu. Na dlan stavite jednu kašiku ulja pa i njega umasirajte u tijesto, oblikujući loptu. Ostavite u zdjeli pokrivenoj pamučnom krpom na sat vremena. Nakon toga, prebacite tijesto na pobrašnjenu površinu i nježno, prstima, ne prevaći preveliki pritisak, oblikujte tijesto u valjak. Isijecite ga na 7 – 8 jednakih kolačića (komada). Te komade oblikujte u loptice, lagano vukući krajeve ka unutra i dlanovima oblikujuci rubove. Loptice pokrijte pamučnom krpom i ostavite 10 minuta da tijesto odmori. Nakon toga, oklagijom razvijte onoliko koliko se da razviti bez dodadnog napora i pritiska. Uradite to sa svakom kuglicom, pa ponovo pokrijte na 2 minute. Tijesto ce onda biti spremno za dodatno razlačenje. Razvaljajte još malo, na veličinu vaše neprijanjajuće tave, pa opet pokrijte na 2 minute dok dobro ne zagrijete tavu. Ne koristite ulje. Pogačice se peku na vreloj, suhoj tavi. Nakon 30 sekundi prevrnite na drugu stranu. Kada ste 30 sekundi pekli na drugoj, vratite ju na početnu. Za nekoliko sekundi će početi da se pušu. Dozvolite da se napušu do kraja, pa još jednom prevrnite na drugu stranu. Kada izvadite iz tave, premažite puterom. P.S. Nakon prve, tava će vjerovatno biti prevruća. Pazite da ne zagore. Smanjite vatru po potrebi. 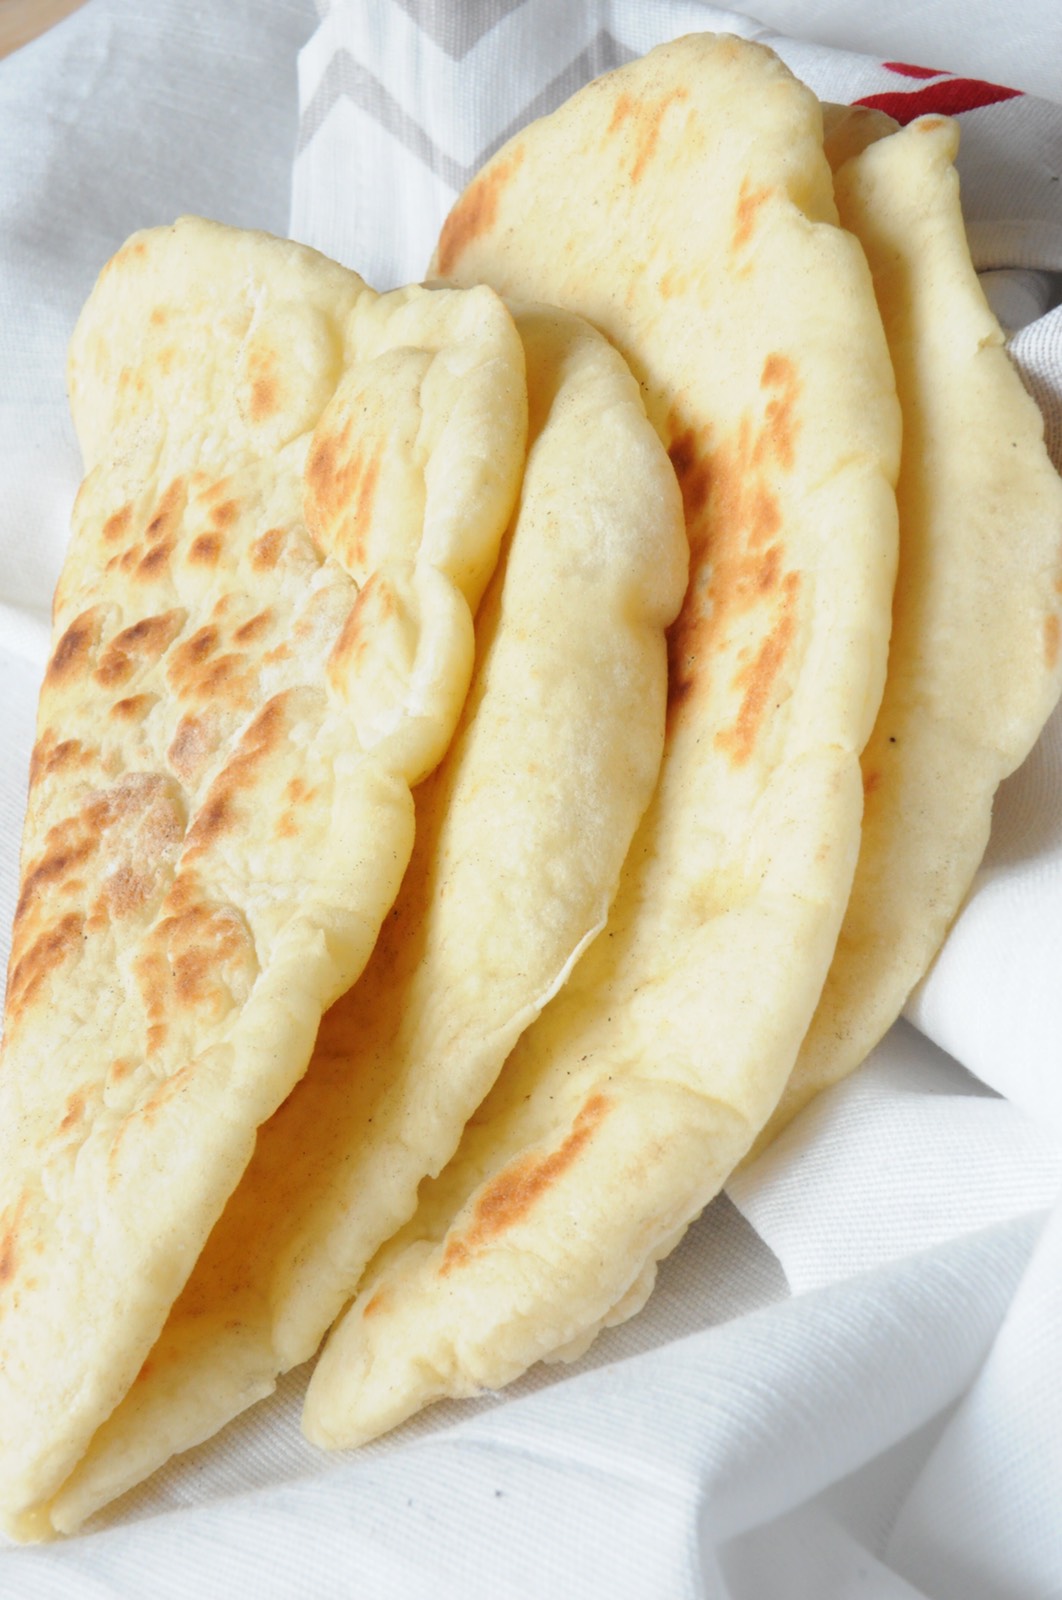 
0 Comments
Leave a Reply. |
AuthorFull time food lover, spare time - delicious & easy recipes creator Archives
February 2022
|